From Beginner To Expert: How To Make Challah Bread Like A Pro – A Step-by-step Guide!
What To Know
- Place the dough in a lightly oiled bowl, cover with plastic wrap, and let rise in a warm place for 1-2 hours, or until doubled in size.
- Cover the braided challah with plastic wrap and let rise in a warm place for 30-45 minutes, or until almost doubled in size.
- Challah bread can be stored at room temperature for 2-3 days or in the refrigerator for up to a week.
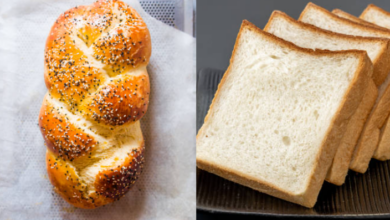
Challah bread, with its golden crust and fluffy interior, is a beloved Jewish tradition that has graced tables for centuries. Its distinctive braided shape and rich flavor make it a centerpiece of many celebrations and a culinary delight enjoyed by all. If you’ve ever wondered how to make challah bread, this comprehensive guide will lead you through every step, ensuring you create a masterpiece that will impress your family and friends.
Gathering the Ingredients
Before embarking on this culinary adventure, gather the following ingredients:
- 5 cups (600g) bread flour, plus more for dusting
- 1 tablespoon (15g) active dry yeast or 2 teaspoons (6g) instant yeast
- 1 tablespoon (15ml) honey or sugar
- 1 1/2 teaspoons (9g) salt
- 1 1/4 cups (300ml) warm water (110-115°F / 43-46°C)
- 1 large egg, beaten
Step 1: Activating the Yeast
In a small bowl, combine the warm water, honey, and yeast. Let stand for 5-10 minutes, or until the yeast becomes foamy and active.
Step 2: Making the Dough
In a large bowl, whisk together the flour and salt. Add the activated yeast mixture and beaten egg to the dry ingredients. Using a wooden spoon, mix until a dough forms.
Step 3: Kneading the Dough
Turn the dough out onto a lightly floured surface and begin kneading. Continue kneading for 5-7 minutes, or until the dough becomes smooth and elastic.
Step 4: Rising the Dough
Place the dough in a lightly oiled bowl, cover with plastic wrap, and let rise in a warm place for 1-2 hours, or until doubled in size.
Step 5: Dividing and Shaping the Dough
Once risen, punch down the dough and divide it into three equal parts. Roll each part into a long, thin strand.
Step 6: Braiding the Challah
Place the three strands side by side on a lightly greased baking sheet. Braid the strands together, alternating the strands over and under each other. Pinch the ends together to secure.
Step 7: Second Rising
Cover the braided challah with plastic wrap and let rise in a warm place for 30-45 minutes, or until almost doubled in size.
Step 8: Baking the Challah
Preheat the oven to 375°F (190°C). Brush the challah with the remaining beaten egg and sprinkle with sesame seeds, poppy seeds, or other desired toppings. Bake for 25-30 minutes, or until golden brown and the bread sounds hollow when tapped.
Step 9: Cooling and Enjoying
Remove the challah from the oven and let cool on a wire rack before slicing and serving.
Tips for Success
- Use high-quality bread flour for a better texture and flavor.
- Knead the dough properly to develop the gluten and create a strong structure.
- Let the dough rise in a warm, draft-free place to promote proper fermentation.
- Braid the challah tightly to prevent it from unraveling during baking.
- Brush the challah with egg wash before baking to create a shiny crust.
Enduring the Challah Tradition
Challah bread transcends its culinary significance; it holds cultural and spiritual value. Its braided shape symbolizes the intertwined strands of community, while its golden crust represents the blessings and prosperity bestowed upon those who partake. As you savor each slice, remember the generations of bakers who have passed down this cherished tradition, connecting you to a rich heritage.
Basics You Wanted To Know
Q: Can I use instant yeast instead of active dry yeast?
A: Yes, you can use 2 teaspoons (6g) of instant yeast instead of 1 tablespoon (15g) of active dry yeast.
Q: How long can I store challah bread?
A: Challah bread can be stored at room temperature for 2-3 days or in the refrigerator for up to a week.
Q: Can I freeze challah bread?
A: Yes, you can freeze challah bread for up to 3 months. Thaw at room temperature before serving.
Q: Why is my challah bread dense?
A: This could be due to over-kneading, not letting the dough rise long enough, or using too much flour.
Q: Why did my challah bread unravel during baking?
A: This could be due to not braiding the challah tightly enough or over-proofing the dough.
