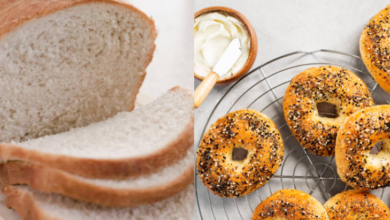
Japanese White Bread Recipe: The Simplest Way To Make Bakery-quality Buns At Home
What To Know
- In this comprehensive guide, we embark on a step-by-step journey to unlock the secrets of how to make Japanese white bread that will leave you utterly smitten.
- Place the dough in a lightly oiled bowl, cover it with plastic wrap, and let it rise in a warm place for 1-2 hours, or until doubled in size.
- Too high a temperature can burn the bread, while too low a temperature will result in a dense loaf.
Whether you’re a seasoned baker or just starting your culinary adventure, the tantalizing world of Japanese white bread awaits your exploration. With its ethereal lightness, pillowy texture, and subtle sweetness, this bread has captivated taste buds around the globe. In this comprehensive guide, we embark on a step-by-step journey to unlock the secrets of how to make Japanese white bread that will leave you utterly smitten.
Ingredients: The Foundation of Bread Bliss
The key to creating an authentic Japanese white bread lies in the careful selection of ingredients:
- Bread flour: High in protein, this flour provides the necessary structure for a lofty loaf.
- Water: Lukewarm water activates the yeast and initiates the fermentation process.
- Sugar: A touch of sugar provides nourishment for the yeast, promoting its growth.
- Salt: Enhances the bread’s flavor and balances the sweetness.
- Instant yeast: This readily available yeast simplifies the rising process.
- Milk powder (optional): Adds a subtle richness and enhances the bread’s golden color.
Step-by-Step Guide: From Dough to Delight
1. Mixing the Dough: A Gentle Embrace
In a large bowl, combine the bread flour, sugar, salt, and milk powder (if using). Create a well in the center and add the lukewarm water and instant yeast. Using a wooden spoon or your hands, gradually incorporate the flour into the wet ingredients until a shaggy dough forms.
2. Kneading: A Labor of Love
Turn the dough out onto a lightly floured surface and knead for 5-7 minutes. This rhythmic motion helps develop the gluten, giving the bread its signature elasticity.
3. First Rise: A Time for Patience
Place the dough in a lightly oiled bowl, cover it with plastic wrap, and let it rise in a warm place for 1-2 hours, or until doubled in size.
4. Shaping the Loaf: An Artistic Endeavor
Once risen, punch down the dough to release any air bubbles. Divide it into two equal parts and shape them into loaves. Place them in a lightly greased loaf pan.
5. Second Rise: Heightening Expectations
Cover the loaves with plastic wrap and allow them to rise again for 30-45 minutes, or until they have almost doubled in size.
6. Baking: The Moment of Truth
Preheat your oven to 375°F (190°C). Bake the loaves for 25-30 minutes, or until they are golden brown and sound hollow when tapped.
7. Cooling: A Culinary Symphony
Remove the loaves from the oven and let them cool on a wire rack for at least 30 minutes before slicing. This allows the bread to set and develop its full flavor.
Tips for Perfection: Enhancing Your Breadmaking Skills
- Use high-quality ingredients: The quality of your bread directly reflects the ingredients you use. Opt for premium bread flour and fresh ingredients.
- Proof the yeast: Before adding the yeast to the dough, test its viability by mixing it with a little warm water and sugar. If bubbles form, the yeast is active and ready to use.
- Knead thoroughly: Proper kneading is crucial for developing the gluten network, which gives the bread its structure and elasticity.
- Allow ample rising time: Don’t rush the rising process. Patience is key to achieving a light and airy loaf.
- Bake at the right temperature: Too high a temperature can burn the bread, while too low a temperature will result in a dense loaf.
Variations on a Classic: Exploring Bread’s Versatility
- Hokkaido Milk Bread: Enriched with milk and butter, this bread has a soft and fluffy texture.
- Japanese Shokupan: A traditional Japanese white bread characterized by its rectangular shape and slightly sweet flavor.
- Melon Pan: A popular bakery item, melon pan is filled with a sweet custard and topped with a cookie crust.
Storing and Enjoying: Preserving Bread’s Delights
- Store at room temperature: Keep your Japanese white bread in a sealed plastic bag at room temperature for up to 3 days.
- Freeze for longer storage: For longer storage, slice the bread and freeze it in airtight freezer bags for up to 2 months.
- Toast for a crispy treat: Toasting slices of Japanese white bread enhances their flavor and adds a satisfying crunch.
- Pair with your favorite toppings: Enjoy your bread with a variety of toppings, such as butter, jam, or honey.
What You Need to Learn
Q: How can I make my Japanese white bread more fluffy?
A: Ensure thorough kneading to develop the gluten network. Also, allow ample rising time for the dough to expand and become airy.
Q: Why is my bread dense and heavy?
A: Check if you have used the correct amount of yeast and that it was active before adding it to the dough. Insufficient kneading or rising time can also lead to dense bread.
Q: How do I prevent my bread from burning?
A: Use an oven thermometer to ensure accurate temperature. Lower the oven temperature or cover the bread with foil if it starts to brown too quickly.
