Step-by-step guide: how to make authentic guyanese fried rice at home
What To Know
- Guyanese fried rice is a versatile dish that can be served as a main course, side dish, or even breakfast.
- Mastering how to make fried rice Guyanese style is a culinary journey that will reward you with a flavorful and satisfying dish.
- Store leftover fried rice in an airtight container in the refrigerator for up to 3 days.
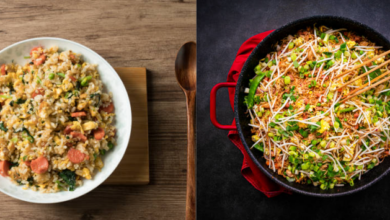
Guyanese fried rice is a delectable dish that combines the vibrant flavors of the Caribbean with the comforting warmth of Chinese cuisine. If you’re wondering how to make fried rice Guyanese style, follow this comprehensive guide and prepare yourself for a culinary adventure.
Ingredients:
- 2 cups cooked rice (day-old or cold rice works best)
- 1/2 cup chopped onion
- 1/2 cup chopped bell pepper (any color)
- 1/2 cup chopped carrots
- 1/2 cup chopped celery
- 1/4 cup soy sauce
- 2 tablespoons vegetable oil
- 1/4 teaspoon garlic powder
- 1/4 teaspoon ginger powder
- 1/4 teaspoon black pepper
- 1/4 teaspoon salt
- Optional: 1/2 cup cooked chicken, shrimp, or tofu
Step-by-Step Instructions:
1. Prepare the Rice:
Cook the rice ahead of time and let it cool completely. This will prevent it from becoming mushy when fried.
2. Sauté the Vegetables:
Heat the vegetable oil in a large wok or skillet over medium-high heat. Add the onion, bell pepper, carrots, and celery and sauté until softened.
3. Season the Vegetables:
Sprinkle the garlic powder, ginger powder, black pepper, and salt over the sautéed vegetables. Stir to combine.
4. Add the Rice:
Add the cooked rice to the skillet and stir to combine with the vegetables. Use a spatula to break up any clumps of rice.
5. Season the Rice:
Pour the soy sauce over the rice and stir to coat evenly. Taste and adjust the seasoning to your preference.
6. Add Optional Ingredients:
If desired, add cooked chicken, shrimp, or tofu to the fried rice. Stir to combine.
7. Cook Until Golden Brown:
Continue cooking the fried rice over medium heat, stirring occasionally, until it becomes golden brown and slightly crispy.
Tips for Perfect Guyanese Fried Rice:
- Use day-old rice for optimal texture. Freshly cooked rice will be too moist and sticky.
- Don’t overcrowd the skillet. This will prevent the rice from browning evenly.
- Stir the rice constantly to prevent burning.
- Adjust the seasonings to your taste. Guyanese fried rice is typically savory and slightly spicy.
Variations:
- Add a splash of pineapple juice or coconut milk for a tropical twist.
- Stir in chopped mango or avocado for a refreshing touch.
- Top with fried eggs or crispy shallots for extra flavor.
Serving Suggestions:
Guyanese fried rice is a versatile dish that can be served as a main course, side dish, or even breakfast. Pair it with curried chicken, grilled fish, or a simple green salad.
Wrapping Up: The Ultimate Guyanese Fried Rice Experience
Mastering how to make fried rice Guyanese style is a culinary journey that will reward you with a flavorful and satisfying dish. By following the steps outlined above and experimenting with different variations, you can create a fried rice that is uniquely yours. Enjoy the vibrant flavors of this Caribbean-Chinese fusion and share the culinary love with your family and friends.
What People Want to Know
Q: Can I use brown rice for Guyanese fried rice?
A: Yes, you can use brown rice, but it will take longer to cook and may not get as crispy as white rice.
Q: What can I substitute for soy sauce?
A: You can substitute tamari sauce or coconut aminos for soy sauce.
Q: How do I store leftover Guyanese fried rice?
A: Store leftover fried rice in an airtight container in the refrigerator for up to 3 days. Reheat in a skillet or microwave before serving.