Learn How To Make The Perfect Homemade Challah Bread In Just 3 Simple Steps!
What To Know
- Place the dough in a lightly oiled bowl, cover it with plastic wrap, and let it rise in a warm place for 1-2 hours, or until doubled in size.
- Let the dough rise in a warm place, such as on top of the refrigerator or in a turned-off oven with the light on.
- Whether you’re a seasoned baker or a novice in the kitchen, this guide will empower you to craft your own masterpiece that will bring warmth and nourishment to your table.
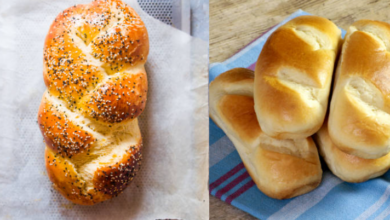
Challah, the golden-hued, braided bread synonymous with Jewish tradition, embodies a symphony of flavors and textures. Its soft, pillowy interior and crisp, caramelized crust tantalize taste buds, making it a beloved staple for Shabbat and holidays. This comprehensive guide will empower you to create your own heavenly challah at home, transforming your kitchen into a sanctuary of baking bliss.
Gathering the Ingredients
Before embarking on this culinary adventure, ensure you have all the necessary ingredients:
- 3 cups (360g) bread flour, plus more for dusting
- 1 teaspoon (5g) active dry yeast
- 1 teaspoon (5g) sugar
- 1 teaspoon (5g) salt
- 1 cup (240ml) warm water (105-115°F / 41-46°C)
- 2 large eggs, beaten
- 1 tablespoon (15ml) vegetable oil
Step 1: Activating the Yeast
In a small bowl, whisk together the warm water, sugar, and yeast. Let stand for 5-10 minutes, or until the yeast foams and becomes active.
Step 2: Mixing the Dough
In a large bowl, combine the flour and salt. Create a well in the center and pour in the activated yeast mixture. Add half of the beaten eggs and oil. Using a wooden spoon or your hands, gradually incorporate the flour into the wet ingredients, forming a sticky dough.
Step 3: Kneading the Dough
Turn the dough out onto a lightly floured surface and knead for 5-7 minutes, or until it becomes smooth and elastic. If the dough is too sticky, add a little more flour. If it’s too dry, add a splash of water.
Step 4: First Rise
Place the dough in a lightly oiled bowl, cover it with plastic wrap, and let it rise in a warm place for 1-2 hours, or until doubled in size.
Step 5: Shaping the Challah
Once the dough has risen, punch it down to release the air. Divide it into three equal parts and roll each part into a long rope. Braid the ropes together, pinching the ends to seal.
Step 6: Second Rise
Place the braided challah on a baking sheet lined with parchment paper. Cover it with plastic wrap and let it rise for another 30-45 minutes, or until almost doubled in size.
Step 7: Egg Wash and Baking
Preheat the oven to 375°F (190°C). Whisk the remaining egg with a little water to create an egg wash. Brush the challah with the egg wash and sprinkle with poppy seeds or sesame seeds, if desired. Bake for 30-35 minutes, or until golden brown and cooked through.
The Joy of Homemade Challah
As you savor the aroma and taste of your homemade challah, relish the satisfaction of creating something truly special. Its soft, fluffy texture and delicate sweetness will delight your family and friends, making every meal a cherished memory.
Tips for Success
- Use high-quality bread flour for a more flavorful and chewy challah.
- Don’t overmix the dough, as this can result in a tough bread.
- Let the dough rise in a warm place, such as on top of the refrigerator or in a turned-off oven with the light on.
- If you don’t have parchment paper, you can grease the baking sheet instead.
- Store the challah at room temperature for up to 3 days, or freeze it for up to 2 months.
Variations
- For a sweeter challah, add 1/4 cup (50g) of sugar to the dough.
- For a savory challah, add 1/4 cup (25g) of finely grated Parmesan cheese to the dough.
- For a fruit-filled challah, add 1/2 cup (75g) of dried fruit, such as raisins, cranberries, or apricots, to the dough.
Troubleshooting
- If your challah is too dense, it may have been overmixed or not kneaded enough.
- If your challah is too dry, it may have not risen enough or been baked too long.
- If your challah is too wet, it may have not been kneaded enough or baked long enough.
Summary: The Gift of Challah
Homemade challah is more than just a bread; it’s a symbol of tradition, love, and the joy of creation. Whether you’re a seasoned baker or a novice in the kitchen, this guide will empower you to craft your own masterpiece that will bring warmth and nourishment to your table. May the aroma of freshly baked challah forever fill your home with happiness and memories.
What You Need to Know
Q: Can I make challah without eggs?
A: Yes, you can substitute 1/4 cup (60ml) of plant-based milk for the eggs.
Q: Can I use instant yeast instead of active dry yeast?
A: Yes, use half the amount of instant yeast and dissolve it in the warm water before adding it to the flour.
Q: How can I make my challah look more golden brown?
A: Brush the challah with a mixture of honey and water before baking.